June 10, 2025

Apartment, Commercial Building, Residential Building

Everything You Need to Know About Concrete Slab Casting

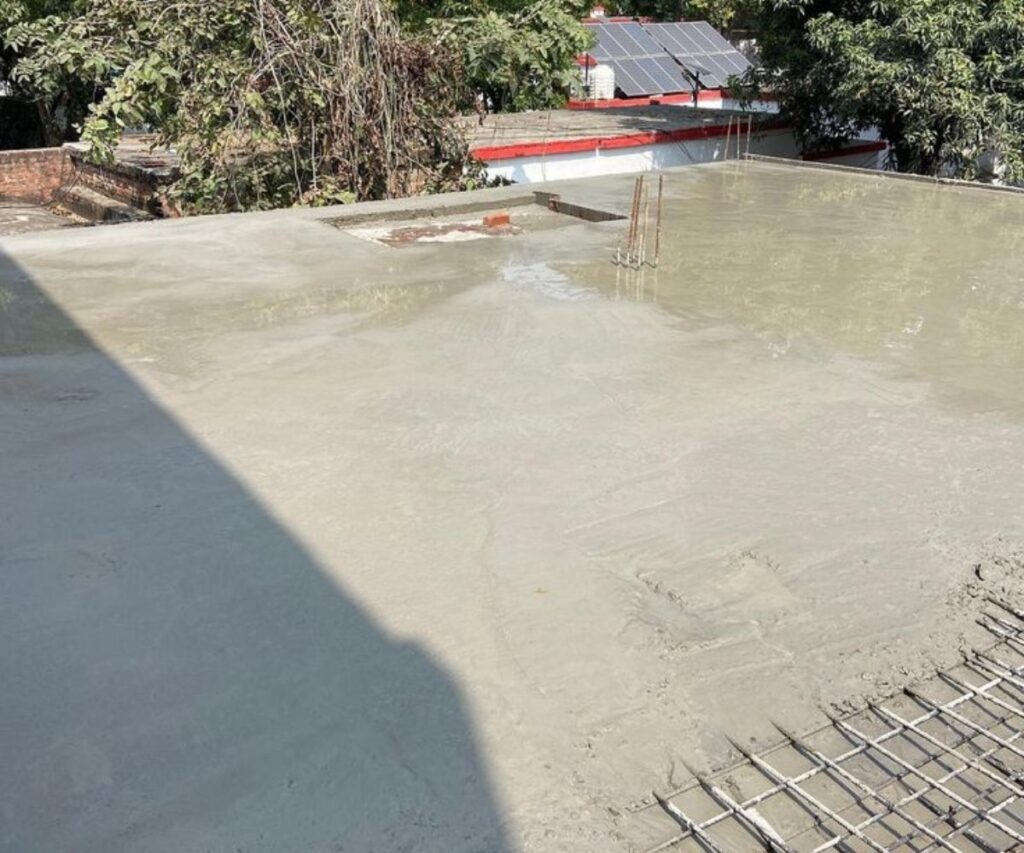
A Beginner-to-Expert Guide on Slab Casting in Modern Construction You may have walked across a smooth concrete floor without giving much thought to what lies beneath. That seamless surface is the result of slab casting—a fundamental process in modern construction. Slabs serve as one of the most critical structural elements in any building, providing strength, stability, and usable surfaces that support the entire load of the structure. This guide covers everything you need to know about slab casting—from basic principles and materials to detailed steps and safety considerations. Whether you’re a homeowner curious about construction or a professional seeking a refresher, this comprehensive guide simplifies slab casting for every reader. What is Slab Casting? Before diving into the process, let’s understand what a slab really is. A slab is a flat, horizontal structural element with relatively small thickness, typically used for floors, ceilings, and roofs. It acts as both a shelter and a load-bearing element by distributing loads in one or both directions. Slabs are often supported by beams, columns, or walls and are generally made of reinforced cement concrete (RCC), which allows them to resist tensile and compressive forces efficiently. Slab casting, then, refers to the process of preparing and pouring concrete to create these slabs, ensuring they’re durable and structurally sound. Materials Used in Slab Casting The primary materials involved in slab casting include: Concrete: A mix of cement, water, and aggregates like sand, gravel, or crushed stone. The proportions vary based on the slab’s function and required strength. Reinforcement Steel (Rebar): Provides the tensile strength needed to prevent cracks and structural failure. Formwork: Temporary moulds made from wood, metal, or plastic that hold the concrete in place until it sets. Release Agents: Applied to formwork to prevent concrete from sticking. Selecting high-quality materials and following standard construction procedures are essential for ensuring strength, durability, and safety in slab construction. Step-by-Step RCC Slab Casting Process 1. Site Preparation Level and compact the site to ensure a solid foundation capable of supporting the slab. 2. Formwork Construction Install formwork based on the slab’s design. It must be rigid, properly aligned, and strong enough to handle the concrete’s weight during pouring and curing. 3. Placing Reinforcement Reinforcement bars are laid in a grid pattern inside the formwork and tied securely to prevent shifting during the pour. This helps in withstanding tensile forces and ensuring long-term durability. 4. Concrete Mixing and Pouring Ensure all materials and machinery are in place before the pour. The concrete mix should be consistent, with no interruptions during pouring to avoid weak joints. After pouring, the concrete must be spread evenly and compacted to eliminate air pockets. 5. Surface Finishing Use a trowel or screed board to smoothen the surface after pouring. 6. Curing The concrete must be kept moist and cool for several days to ensure it develops maximum strength. This may include sprinkling water, using wet burlap, or applying curing compounds. 7. Quality Checks and Inspection Before removing the formwork, inspect the slab for cracks, honeycombing, or other defects. Ensure that it has achieved the necessary strength as per IS code standards. Key Considerations Before Slab Casting Formwork Inspection: Ensure proper alignment, strength, and stability of the mould. Reinforcement Placement: Bars must be accurately placed and secured according to the design. Concrete Quality: Use a consistent, well-proportioned mix, and avoid interruptions during pouring. Curing Conditions: Protect the slab from premature drying, which can lead to cracks. Quality Control: Conduct regular inspections to identify and resolve issues early. Safety Measures: Ensure use of personal protective equipment (PPE), site safety protocols, and hazard mitigation. Common Mistakes to Avoid Using Substandard Materials: Leads to early failure and costly repairs. Improper Formwork or Reinforcement Placement: Can result in deformation or structural failure. Inadequate Curing: Reduces slab strength significantly. Poor Supervision or Workmanship: Leads to inconsistency and long-term structural issues. Conclusion Reinforced concrete slab casting is not just a standard construction step—it’s a foundational practice that demands accuracy, expertise, and attention to detail. Proper execution ensures a strong, durable structure capable of withstanding the demands of time and environment. By following the right materials, methods, and safety practices, homeowners and professionals alike can ensure quality outcomes. Whether for residential homes or large-scale infrastructure, slab casting remains a vital aspect of reliable construction.

Apartment, Residential Building

Babyproofing Your Indian Home: Room-by-Room Guide for Child Safety

Practical Safety Tips for Every Parent to Create a Child-Friendly Living Space Are you a new parent or guardian? Life with a little one can be filled with joy—and surprises. Amid daily tasks like checking your phone, replying to messages, or completing household chores, your curious toddler might be busy discovering new things, sometimes in unsafe ways—like reaching for a cleaning bottle or poking tiny fingers into electrical sockets. That’s why babyproofing isn’t just an option—it’s essential. This guide will walk you through everything you need to know about making your home safer for your child, room by room. Why Babyproofing Matters More Than Ever In traditional Indian households, children grew up under the watchful eyes of grandparents, uncles, aunts, and cousins. But with the rise of nuclear families, parents are often managing childcare alone. According to a study by Bhuvaneswari et al. (2018), nearly 40% of children face home-related injuries each year, especially those aged 1 to 3 years. Most injuries involve falls, followed by burns, choking, and poisoning—usually from everyday household hazards. Babyproofing helps prevent these risks by turning your home into a safe zone where your child can explore freely. Basic Babyproofing Tips for Every Room Install Smoke & Gas Detectors: These devices alert you early about smoke or dangerous gases. Test monthly and replace batteries annually. Cover Electrical Outlets: Use childproof covers for plug points to avoid shocks or accidents. Anchor Furniture: Secure bookshelves, glass cabinets, and dressers to the wall. Arrange heavy furniture to prevent tipping. Choose Safe Paints: Avoid paints that may contain lead or harmful chemicals. Opt for certified non-toxic options. Babyproofing Checklist by Room Living Room Safety Your child will likely spend a lot of time here. Secure sharp-edged furniture with soft guards, remove breakable items, and keep cords and electronic devices out of reach. Use essential childproofing gear like: Outlet covers Baby gates Cabinet locks Doorknob covers Kitchen Safety for Curious Minds Kitchens are filled with sharp tools and hot surfaces—make them off-limits or child-safe by: Locking sharp tools and chemicals in high cabinets or drawers Using appliance latches for ovens, fridges, microwaves Installing stove guards and knob covers Switching to natural, non-toxic cleaning products Keeping hot food and drinks out of reach Hiding or securing appliance cords Bathroom Childproofing Tips Bathrooms can be especially hazardous, so consider these must-dos: Set water heater to no more than 49°C (120.2°F) Store personal care items and sharp tools in locked cabinets Install toilet locks and always close the lid Keep the bathroom dry with nonslip mats Never leave a child unattended near water Cover tap spouts with soft covers Nursery & Baby’s Room Safety A baby’s room should be calm, clean, and most importantly—safe: Choose a crib that meets safety standards (fixed sides, proper slat spacing, non-toxic paint) Remove hanging toys once your child can push up Place cribs away from cords, heaters, or wall decor Use mosquito nets designed specifically for babies Install bed guardrails for toddlers and place cushions around the bed Childproofing Other Bedrooms For older toddlers: Use baby gates at the door to prevent night wanderings Install window guards to prevent falls Anchor wardrobes and dressers to prevent tipping Use a baby monitor for extra peace of mind Follow safe sleep practices—on their back, in their bed, in a smoke-free room Safe Stairs and Balconies Stairs and balconies pose major fall risks. Minimize these with: Baby gates at the top and bottom of staircases Balcony nets or Plexiglas sheets over railings Keep furniture away from railings to prevent climbing Inspect gates and safety nets regularly for damage Electrical Safety at Home Prevent accidental shocks with these tips: Use socket covers specifically made for Indian outlets Use power strip covers and cord shorteners Avoid keeping plugged-in devices near water sources Secure loose cords and avoid using extension cords on the floor Teach basic safety rules as your child grows Emergency Readiness Tips Being prepared for emergencies is just as important as preventing them. Here’s how: Learn basic CPR and choking response for babies and toddlers Keep a first-aid box in easy-to-access locations Install and maintain fire extinguishers—practice using them Teach your child the danger of fire Have an escape plan and practice it with your family Display emergency numbers like 112 (ambulance) and 101 (fire) on the fridge or near phones Babyproofing on a Budget: Creative DIY Hacks You don’t need to spend a fortune: Use pool noodles or pipe insulation on sharp table edges Convert hair ties into temporary cabinet locks Use rubber bands to secure cupboard handles Place soft padding or mats near beds and stairs If you’re building or renovating your home, plan safety features ahead to integrate babyproofing into the design for lasting results. Final Thoughts Babyproofing is not just about adding gadgets—it’s about creating a home that encourages safe exploration. With thoughtful planning and a little effort, you can make your home a haven for your growing child, giving them the freedom to move, play, and learn safely.

Interior

Ultimate Guide to Designing a Man Cave at Home

From Cozy Corners to High-Tech Havens — Everything You Need to Create a Personalized Escape A man cave isn’t just a spare room with a couch and a TV. It’s a personalized retreat—a space crafted for relaxation, hobbies, and entertainment. Whether you’re into gaming, fitness, movies, or just want a quiet place to unwind, your man cave should reflect your interests and personality. What Is a Man Cave? A man cave is a specially designated area in the home that serves as a personal sanctuary. It’s a place to enjoy hobbies, display collectibles, entertain friends, or simply take a break from the everyday rush. From sports memorabilia to home bars, each space is unique to its owner’s taste and lifestyle. How to Plan the Perfect Man Cave Choose the Right Space Look for underused areas like the garage, basement, attic, spare room, or even an outdoor shed. Make sure it suits your purpose in terms of accessibility, space, lighting, and privacy. Measure and Assess Check the dimensions of the space and assess what needs to be added or improved—such as electrical access, insulation, or ventilation. Ensure there’s enough room for furniture and features. Set Your Budget Decide how much you want to invest. You can create a man cave on a modest budget by using second-hand furniture and DIY elements, or go all out with custom installations and smart tech. Communicate with Family Discuss your plans with family members. It may become a shared space or multifunctional room, so cooperation and flexibility help in the long run. Must-Have Features for Comfort and Style Entertainment Setup Depending on your interests, add a big-screen TV, projector, gaming consoles, or sound system for a full cinematic or gaming experience. Comfortable Seating Recliners, beanbags, or a sectional sofa make the space inviting. Choose seating based on whether you prefer solo chill time or group gatherings. Lighting That Sets the Mood Use a combination of ambient and accent lighting—like LED strips, dimmable lamps, neon signs, or themed light fixtures—to personalize the vibe. Smart Storage Floating shelves, hidden drawers, and multi-use furniture help keep things neat while showcasing prized possessions. Personalized Decor Add framed jerseys, vintage posters, vinyl records, memorabilia, or hobby collections. Your space should speak you. Creative Theme Ideas for Your Man Cave Home Gym – Equip with basic fitness tools or yoga mats. Add mirrors and a motivational playlist. Sports Zone – Wall art, team logos, jerseys, and a mini scoreboard bring the stadium feel indoors. Gaming Room – Ergonomic chairs, immersive lighting, soundproofing, and high-performance PCs or consoles are key. Home Bar – Install a mini-fridge, bar stools, mood lighting, and shelves for spirits. Throw in a dartboard or vintage signs for flair. Home Theatre – Add theatre-style seating, blackout curtains, and a projector with surround sound. Karaoke Lounge – Stage lights, soundproof panels, and a mic setup turn your cave into a performance zone. Workshop Nook – Perfect for woodwork, repairs, or crafting. Ventilation, lighting, and tool storage are essential. Reading Retreat – If you love books, add plush chairs, good lighting, and your personal library setup. Should You DIY or Call in the Experts? A DIY man cave gives you total control and can be highly cost-effective—especially if you’re creative or enjoy hands-on work. Add wall decals, repurpose furniture, or even paint your own murals. For more complex installations (like plumbing, wiring, or soundproofing), hiring professionals is a smarter and safer bet. It all depends on your skills, timeline, and the level of finish you’re aiming for. Budget-Friendly Man Cave Tips Start small: repurpose old furniture like an unused table or worn-out armchair. Hunt for deals online or at second-hand shops. Use smart lighting on a budget with LED strips or motion sensors. Opt for compact or multi-functional furniture to save space and money. Final Thoughts & Inspiration Creating your man cave doesn’t have to be expensive or done all at once. Take your time, start with essentials, and personalize it as your needs grow. Use platforms like Pinterest or Instagram to discover layouts and real-life setups for inspiration. Whether it’s a cozy reading nook or a full-blown gaming haven, make it yours. Your man cave should be your personal playground—a place where you recharge, create, and truly feel at home.

Residential Building

She Shed Ideas: Create the Perfect Backyard Retreat for Women

Create a space just for you — where peace, passion, and personality come together in perfect harmony. Everyone dreams of having a quiet corner all to themselves — a cosy hideaway to relax, reflect, and recharge. Enter the “she shed”: the woman’s answer to the man cave. More than just a backyard building, a she shed is a personal haven that can serve as a reading nook, a creative studio, a yoga zone, or even a mini home office. Whether shared or solely yours, it’s a space where comfort meets character — a sanctuary tailored to your lifestyle. What Is a She Shed? A she shed is a small, standalone space designed as a private retreat for women. Often built in the backyard, it serves as a quiet escape from daily distractions. Whether it’s used for meditation, crafting, writing, or simply unwinding, this space is all about you. Think of it as your personal comfort zone where creativity flows and stress melts away. Why Every Woman Deserves a She Shed A Sanctuary for Solitude:Enjoy peaceful moments of self-reflection in a quiet, distraction-free environment. A Creative Escape:Fuel your passions—painting, crafting, writing, or reading—without interruption. Emotional Balance:A private, calming space can support emotional well-being, offering room for release and healing. Home Value Booster:A well-designed she shed can increase your property’s charm and market value. Organised Hobby Zone:Store all your tools and supplies neatly in one place, keeping your home clutter-free. She Shed Ideas & Inspirations Garden GetawaySurround your space with plants and flowers for a refreshing vibe. Add large windows for natural light and views of your garden. Fitness & Wellness NookUse your she shed as a private yoga studio, meditation zone, or mini gym. It’s the perfect place to focus on self-care. Creative Art StudioSet up easels, fabrics, and paints in a space where inspiration strikes. Ideal for sewing, drawing, or designing. Hobby ZoneWhether it’s scrapbooking, photography, or baking, this dedicated room supports your interests with tailored storage and layout. Dance StudioInstall mirrors, flooring, and sound systems to practice and enjoy movement with freedom and joy. Guest HideoutMake your she shed guest-ready by adding a daybed, soft lighting, and storage for essentials. Personal Spa SpaceTransform it into a relaxation hub with a massage table, soft scents, and spa-like lighting for your very own zen zone. How to Build Your Dream She Shed Plan & Budget WiselyChoose the right spot and size in your backyard. Check local regulations and permits before construction. Decide whether to buy a prefab kit or take the DIY route based on your comfort and skill level.  Choose the Right MaterialsOpt for treated wood, weather-resistant roofing, and proper insulation for durability. Concrete slabs or footers make ideal foundations. Add Essential FeaturesEnsure your she shed is comfortable with lighting (string lights, lanterns), ventilation, electrical connections, and maybe even Wi-Fi for streaming or work. Decorating Your She Shed Ergonomic Seating: Armchairs, beanbags, or compact sofas for cozy lounging. Walls with Personality: Use inspiring quotes, framed art, or wallpaper that reflects your vibe. Soft Textiles: Area rugs, cushions, and curtains to add warmth and style. Personal Touches: Family photos, indoor plants, and treasured keepsakes to make it uniquely yours. How to Maintain Your She Shed Inspect Seasonally: Check for leaks, cracks, or signs of damage. Reseal wood and replace worn parts. Keep It Pest-Free: Use weatherstripping and natural repellents like peppermint oil to keep critters out. Declutter & Deep Clean: Once a year, empty and clean everything, reorganize, and refresh the space. Final Thought A she shed is more than a backyard building — it’s a soulful space where peace meets purpose. Whether you’re journaling, crafting, exercising, or simply enjoying your tea, this serene spot can support your passions and well-being. With thoughtful

Interior

Fluted Wall Panels: Modern Design Ideas, Types & Benefits for Stylish Interiors

Transform Your Living Spaces with the Timeless Appeal of Vertical Grooves Are you tired of plain painted walls and outdated interior looks? Give your home a refreshing new dimension by incorporating fluted wall panels. These panels are available in various materials and finishes across India, making it easy to find one that suits your budget and interior design needs. What Are Fluted Wall Panels? Fluted wall panels are decorative panels featuring a series of vertical grooves, also known as flutes. These textured elements add a subtle three-dimensional effect that enhances the aesthetics of any room. Apart from visual appeal, they also contribute to sound insulation and acoustic improvement, making them both functional and stylish. Popular Types of Fluted Wall Panels 1. Fluted Wood Veneer Panels These panels consist of a grooved wood base covered with a thin layer of wood veneer. Available in both engineered and natural wood types, they can be prefinished or customized with stains to match your decor. Installation is simple with tongue-and-groove joints. 2. Wood Slat Wall Panels (Akupanels) Designed for aesthetics and acoustic performance, these panels combine thin wooden slats with PET felt or plywood backing. Ideal for studios, offices, and living spaces, they’re available in eco-friendly options using recycled materials. 3. PVC Fluted Panels Perfect for budget-conscious homeowners, PVC panels are water-, heat-, and chemical-resistant. They’re low-maintenance, easy to clean, and come in a variety of colours—making them a hassle-free alternative to paint or tiles. 4. Milled (Ribbed) Wood Panels Made from thick wood or MDF boards with deep ribbing, these premium panels offer a luxurious feel. While costlier and usually requiring professional installation, they deliver a bold design statement in modern interiors. 5. Metal Fluted Panels Available in materials like stainless steel or aluminum, these panels are durable and ideal for both indoor and outdoor applications. They’re fire-resistant and pest-proof, providing long-term value. 6. WPC (Wood Plastic Composite) Panels A mix of wood fibers and plastics, WPC panels are sturdy, affordable, and ideal for cladding. While not as natural-looking as solid wood, they offer great moisture and termite resistance. 7. Bamboo Panels Eco-friendly and sustainable, bamboo panels come in various finishes and densities. They’re suitable for both interiors and exteriors and offer a warm, organic feel. Why Choose Fluted Panels for Home Décor? Elegant Aesthetics: The vertical grooves offer a clean, contemporary touch to walls. Highly Versatile: Suitable for living rooms, kitchens, bedrooms, offices, and even meditation areas. Space-Enhancing Design: Vertical lines give the illusion of higher ceilings and more space. Low Maintenance & Durable: Most materials are moisture-resistant and easy to clean. Top Interior Design Ideas with Fluted Wall Panels 1. Living Room Accent Wall Create a stunning feature wall with wood fluted panels. They pair beautifully with Japandi-style interiors and provide rich texture without overwhelming the space. 2. Kitchen Backsplash Upgrade Replace conventional tiles with fluted laminate or WPC panels for a modern, seamless backsplash that’s easy to clean and visually appealing. 3. Bedroom Headboard or Wall Accent Add a calming, stylish element to your bedroom by using fluted panels behind the bed. Choose from wood, MDF, or veneer to match your décor. 4. Dining Room with Accent Lighting Enhance dining areas by combining fluted wall panels with ambient lighting. The interplay of grooves and light creates a warm, elegant atmosphere. 5. Bathroom with PVC Fluted Panels Introduce spa-like vibes with moisture-resistant PVC fluted panels. Their smooth texture and ease of maintenance make them perfect for wet areas. 6. Stylish Home Office Backdrop Fluted panels in home offices offer visual sophistication and help with noise control. A natural wood finish can create a balanced, productive environment. How to Install Fluted Wall Panels Installation can be DIY or professionally done. Key steps include: Measure the wall space and plan panel layout. Clean and smooth the surface. Apply adhesive in an “S” pattern to the back of each panel. Press panels firmly into place; use nails or screws if needed. Ensure even alignment for a seamless appearance. Easy Maintenance Tips Dust regularly with a soft cloth or brush. For deeper cleaning, use a mild detergent and a damp cloth. Avoid harsh chemicals and ensure the surface is dry post-cleaning. Final Thoughts Fluted wall panels are a practical, visually rich solution for modern interiors. Whether you prefer the warmth of wood, the durability of PVC, or the eco-friendliness of bamboo, there’s a fluted panel to suit every room and budget. Their simple installation, low upkeep, and aesthetic versatility make them an excellent choice for homeowners looking to refresh their living space with style and elegance.

Interior

Attic Room Makeover Guide: Design Ideas, Smart Conversions & Decor Tips for Indian Homes

Unlock creative potential in unused attic areas with this comprehensive transformation guide Is your attic currently a dumping ground for old boxes and unused items? It’s time to look at this space differently. With thoughtful planning, your attic can become a private, stylish, and functional area—perfect as a bedroom, office, reading nook, or playroom. Let’s explore how to make the most of this hidden gem in your home. Understanding the Space: What Is an Attic Room? An attic room sits just beneath the sloped roof of a home and is known for its angular walls and often limited headspace. Although traditionally used for storage, attics can be transformed into valuable living spaces—offering charm, privacy, and unique design opportunities. Most attics are accessed through stairs or retractable ladders and are generally more spacious than lofts. How a Loft Differs from an Attic A loft is typically a wide-open space with high ceilings, often found in urban homes or former industrial buildings. Lofts are known for their airy, flexible layout and modern vibe. In contrast, attics feel more enclosed and cozy, ideal for intimate rooms like bedrooms or reading corners. Should You Convert Your Attic? Attic conversions offer additional space without extending the building footprint. But before you start, consider: Minimum ceiling height: 7–8 feet is usually required for a habitable room under Indian building norms. Climate concerns: Ensure good insulation, moisture-proofing, and ventilation, especially for hot and humid regions. Permissions: While some attic changes don’t require approval, structural changes might. Always check with your local municipal authority. Step-by-Step Guide to Converting an Attic 1. Get Approvals & Plan Ahead Consult a qualified structural engineer to assess feasibility. Ensure compliance with local regulations, especially regarding fire exits, roof modifications, and load-bearing capacity. 2. Key Construction Essentials Insulation: Spray foam or fiberglass batts can reduce heat transfer. For walls, use ICF or concrete blocks with thermal coatings. Flooring: Use engineered wood or carpeting for comfort and durability. Lighting: Add skylights or energy-efficient LED fixtures. Access: Use spiral stairs for space-saving or traditional stairs for comfort. Creative Ways to Use an Attic Room Children’s Room Kids love attic rooms due to their cozy, imaginative structure. Install safe flooring, insulation, and child-friendly furniture. Decorate with their input for a fun space. Playroom Turn the attic into a vibrant play area. Add bright colors, soft seating, chalkboard walls, and ample lighting. It’s perfect for creativity and learning. Bedroom Retreat With sloped ceilings and great views, an attic bedroom offers unmatched privacy. Use under-eave storage and ensure the room meets safety codes for bedrooms. Home Office Set up an inspiring work zone in the attic with soundproof panels, ergonomic furniture, and ample lighting. Ideal for uninterrupted focus and work-from-home needs. Guest Suite Create a compact guest space with Murphy beds and sliding dividers. Ensure comfort and privacy while maintaining flexibility. Reading Nook Design a tranquil reading area with floor cushions, built-in shelves, and warm lighting. Place it near a dormer or window to maximise natural light. Smart Decorating and Storage Hacks for Attic Spaces Wall Colors Choose whites or light neutrals to reflect natural light and create the illusion of space. Furniture Choices Use foldable desks, angled storage units, and multifunctional furniture that fits under sloped ceilings. Lighting Tricks Install dormer windows or string lights along beams. Use LED fixtures to reduce heat while improving visibility. Storage Tips Use under-roof bins, drawers, or vacuum-sealed bags for seasonal items. Maximise awkward corners with custom shelves or pull-outs. Common Challenges & Practical Solutions Problem Solution Temperature extremes Use aerogel or phase-change insulation materials and install mini-split AC systems. Low natural light Add solar tubes or dormer windows for effective, budget-friendly lighting. Cramped space Use large mirrors and light paint colors to visually expand the room. Attics vs. Lofts: The Clear Difference Feature Attic Loft Structure Enclosed under sloped roof Open layout under roof Access Often via staircase/ladder Staircase, typically part of living space Usage Storage or private rooms Open living, studio-style rooms For any attic conversion project, ensure compliance with NBC 2016 and city-level bylaws. Follow safety norms, especially concerning staircases, ventilation, and fire exits. Final Thoughts: Your Attic, Reimagined With proper planning, insulation, and creativity, attics can be anything you dream of—from cozy bedrooms to productive workspaces. Whether you need more room or a personal retreat, the attic offers endless potential right above your head.

Apartment, Residential Building

Fully Furnished vs Semi-Furnished Homes: Which One Should You Choose?

What is a Fully Furnished Home? A fully furnished home is ready for immediate occupancy, including all essential furniture, appliances, and sometimes even kitchenware and décor. These homes are ideal for individuals seeking a hassle-free move, such as students, professionals, or anyone relocating temporarily or urgently. They provide a complete living experience from day one. What is a Semi-Furnished Home? A semi-furnished home typically includes essential fixtures like wardrobes, kitchen cabinets, light fittings, and sometimes a few appliances. These homes allow you to bring in or purchase your own major furniture, making them perfect for those who prefer customising their space to fit personal preferences. Pros and Cons of Fully Furnished Homes Advantages Immediate move-in with no need to purchase furniture or appliances Great for short-term tenants or frequent movers Saves time and effort during the transition Disadvantages Higher upfront cost Limited ability to personalise décor Responsibility for maintaining included items Furniture quality may vary Pros and Cons of Semi-Furnished Homes Advantages Lower initial cost Flexibility to personalise and decorate as desired Better suited for long-term living Disadvantages Requires additional purchases May take time to make the space fully functional Basic fittings may not match your preferences Fully Furnished vs Semi-Furnished: A Quick Comparison Aspect Fully Furnished Semi-Furnished Cost Higher, includes all furnishings and appliances Lower, includes only essentials Customization Limited flexibility High flexibility to decorate and furnish as desired Maintenance May require upkeep of included items Fewer items included, so less to maintain initially Best Suited For Short-term stays, professionals, quick relocations Long-term stays, families, those preferring personal setup Factors to Consider Before Choosing Between the Two 1. BudgetFully furnished homes typically cost 15–20% more than semi-furnished ones. The location and quality of furnishings also affect the price significantly. 2. Duration of StayIf you’re staying short-term, fully furnished homes are convenient. For longer stays, semi-furnished homes allow for gradual furnishing at your pace. 3. Lifestyle PreferencesChoose based on whether you value instant convenience or long-term personalisation. 4. Location AvailabilitySome areas offer more of one type than the other. Metro cities may have more fully furnished rental options due to demand. 5. Future PlansIf you move frequently, fully furnished homes offer flexibility. But for settling down, a semi-furnished or unfurnished home might be better for gradual customisation. Final Thoughts Whether you opt for a fully furnished or semi-furnished home depends on your individual needs, duration of stay, and budget. A fully furnished home provides immediate comfort and ease, while a semi-furnished one gives you the flexibility to shape your space your way. Evaluate your priorities carefully to make the best decision for your current and future living needs.

Apartment, Residential Building

Smart Toilets for Homes in India: Features, Benefits, and Buying Guide 2025

Smart Toilets in India: Redefining Hygiene, Comfort & Modern Living As disposable incomes in India rise, so do expectations around home hygiene and comfort. With people prioritising health and well-being—especially post-pandemic—home upgrades like smart toilets are gaining popularity. These advanced bathroom fixtures combine technology with convenience to deliver superior hygiene, water efficiency, and comfort. What Are Smart Toilets? A smart toilet integrates technology to improve cleanliness, functionality, and ease of use. These toilets often feature: Heated seats for comfort in colder months Bidet spray systems for water-based personal cleaning Automatic flushing to avoid contact Night lights for visibility Self-cleaning systems that keep the unit clean Such features help promote better sanitation while reducing manual effort and water wastage. Why Are Smart Toilets Becoming a Necessity in Indian Homes? 1. Boosted Hygiene Awareness Post-Pandemic The pandemic shifted attention to personal hygiene. Smart toilets help promote a touch-free, germ-resistant environment through motion sensors and automatic features—an ideal solution for both homes and shared spaces. 2. Water-Saving Technology Smart toilets use intelligent water sensors to control flush volume—often reducing water usage by up to 50% compared to conventional models. Some even flush with as little as 0.6 gallons per use, helping to conserve resources and lower utility bills. 3. Enhanced Touchless Hygiene Features like automated flushing, lid opening/closing, and self-cleaning wands eliminate the need for physical contact, drastically reducing germ transmission. 4. Inclusive Comfort for All Users Smart toilets support universal design, offering easier access for seniors and individuals with disabilities. Functions like voice control, remote operation, and ergonomic seat height ensure effortless usage for all age groups. Key Features of Smart Toilets You Should Know Touchless Flushing: Motion sensors activate flushing after each use. Auto Seat Operation: Seats open and close automatically. Heated Seats: Customizable seat temperatures for added comfort. Built-in Bidet and Air Dryer: Adjustable warm water cleaning and drying. User Profiles: Save personal preferences for multiple users. LED Lighting: Ambient lighting for nighttime use. Touchscreen Remotes: Intuitive control over features. Overflow Protection: Prevents accidental leaks or clogs. Things to Consider Before Installing a Smart Toilet 1. Higher Initial Investment Smart toilets cost significantly more than traditional models. The price varies based on features, design, and brand tier. 2. Installation and Maintenance They often require professional installation and access to a stable power source. Regular maintenance and occasional software updates are crucial to keep all systems running efficiently. 3. Consumer Familiarity and Learning Curve Not everyone is familiar with how smart toilets work. Educating users—especially older adults—on features like the bidet spray, remote functions, and hygiene settings is key to ensuring proper use and satisfaction. How to Choose the Right Smart Toilet for Your Home 1. Shape and Size Choose between round or elongated toilet bowls. Ensure your bidet seat or smart seat attachment is compatible with your existing setup. Leave enough space between the tank and seat for proper fitting. 2. Height Smart toilets often come in comfort height (17–19 inches), which is easier for seniors or those with mobility concerns to use, compared to standard 15-inch models. 3. Key Features to Look For Adjustable Water Pressure & Temperature: For personalized cleaning. Warm Air Dryers: To reduce toilet paper use. Self-Cleaning Wands: For hygiene and maintenance. Night Lighting: Illuminates the bowl area in the dark. Custom User Settings: Saves preferences for different users. Tip: Consider incorporating Vastu Shastra principles for optimal toilet placement and energy flow in your home. Maintenance Tips to Keep Your Smart Toilet in Top Shape Proper upkeep enhances your smart toilet’s longevity: Avoid harsh chemical cleaners on plastic and electronic parts. Clean the nozzle and seat area with a soft cloth or brush. Check for firmware updates and sensor calibration if your model supports them. Regularly inspect water connections and electrical fittings. Clean detachable parts separately with mild, non-corrosive cleaners. Final Thoughts: A Smart Investment for a Healthier Home Smart toilets offer an elevated bathroom experience—cleaner, more efficient, and remarkably comfortable. While the upfront investment may be higher, the long-term benefits—including better hygiene, water savings, and convenience—make them a valuable addition, especially for modern families and elder-friendly homes. Whether you’re building a new home or upgrading your bathroom, smart toilets are worth considering as part of the future of health-conscious, sustainable living.

Interior

Secret Room Designs: Build Concealed Spaces in Modern Homes

Creative Hidden Room & Secret Passage Ideas for Modern Homes From ancient palaces to heritage homes, India’s architecture has long embraced the idea of secret chambers and hidden passageways. In today’s context, the concept is making a comeback—not only for aesthetics and novelty but for security, privacy, and practical utility. Whether to store valuables, create a private retreat, or simply add intrigue to your home, secret rooms and concealed doors are both fascinating and functional additions. What Is a Secret Room? A secret room is a concealed space in a house, intentionally designed to be hidden from plain view. While it’s part of the home’s physical structure, it remains invisible unless you know where to look. These rooms serve multiple purposes—safe rooms during emergencies, secure storage, private retreats, or creative entertainment spaces. Why Consider Hidden Rooms or Secret Passages in Your Home? 1. Enhanced Security & Privacy Hidden rooms provide an added layer of protection during emergencies, offering a discreet place to store valuable items or even serve as panic rooms. Since these spaces are concealed, they deter both intruders and common thieves. 2. Fun & Novelty From home theatres to game rooms, these secret areas introduce excitement and mystery into your home. Children especially love the idea of a “secret place,” and it adds a storybook charm for adults too. 3. Smart Storage Solutions Secret rooms make for excellent hidden storage—whether for personal documents, heirlooms, wine collections, or even just clutter you want out of sight but still within reach. 4. Boost Property Value A well-designed secret room can increase the appeal and resale value of a home—particularly in the luxury housing market where uniqueness and exclusivity are prized. 5. Multi-Functional Use Modern hidden rooms can be adaptive—acting as a reading nook by day and home theatre by night. Their versatility makes them a valuable investment in maximizing space efficiently. Popular Ideas for Hidden Rooms and Secret Entryways Mirror Concealed Doors Large mirrors can double as secret entrances. Whether hiding a walk-in closet or a private office, a mirror-door combo maintains both elegance and discretion. Bookcase Doorways Classic and clever—a bookcase that swings open to reveal a secret room behind it. Ideal for libraries, studies, or even a hidden bedroom. Under-Staircase Hideaways Convert unused space under the stairs into something functional—like a cozy reading nook, compact office, or hidden storage—sealed behind a camouflaged door. Trapdoors & Floor Hatches Floor hatches can lead to wine cellars, underground storage, or escape tunnels. These add layers of mystery while maximizing vertical space. False Backs in Cabinets Closets and kitchen cabinets can conceal entries to hidden areas behind removable panels—a design borrowed from classic literature and fantasy tales. Hidden Attic Access Attic spaces can be converted into retreat zones, hobby rooms, or guest bedrooms—accessible through retractable ladders or hidden ceiling panels. Steps to Design and Build a Hidden Room You don’t need a mansion or a spy lifestyle to enjoy the benefits of a secret room. Here’s how you can get started: Define Your Purpose Determine what you’ll use the hidden room for—security, leisure, storage, or all of the above. This will guide its design and access method. Choose the Right Location Evaluate your home for suitable spots: behind wardrobes, inside large cabinets, under stairs, or within existing unused corners. Create a Design Plan Sketch a detailed layout or hire a professional for architectural support—especially for large or complex hidden spaces. Gather Tools & Materials Basic construction will require both power tools (saws, drills, nail guns) and hand tools (levels, hammers, screwdrivers). Ensure measurements are precise to maintain concealment. Smart Technology for Modern Hidden Rooms Take your secret space to the next level with integrated smart tech: Biometric Access (Fingerprint/Face Scan)Allows secure, personalized access—ideal for panic rooms or storing valuables. Remote-Controlled DoorsOpen or close entrances via smartphone apps or voice commands. Motion-Sensor LightingLights activate only when someone enters, preserving secrecy and saving power. Keypad or RFID LocksEasy to use, tamper-proof, and discreetly built into bookshelves or mirror frames. Final Thoughts: Why Hidden Rooms Matter Today In an age of increasing concern about privacy, security, and smart space utilization, hidden rooms are not just gimmicks—they’re practical investments. Whether you’re seeking a safe zone, secret storage, or just a slice of mystery, incorporating a hidden room or passageway can dramatically transform how you experience your living space. With thoughtful planning and modern tools, your home can become not just a place to live, but a personalized sanctuary full of surprises.

Interior

Smart Laundry Room Design Ideas for Indian Homes – Layouts, Tips & Materials

Smart Laundry Room Designs for Every Indian Home Whether it’s a coffee spill on your shirt or a regular wash day, the laundry room is your go-to space. But it’s more than just a corner for cleaning clothes — it’s a dedicated zone where functionality meets comfort. If you’re planning to include a laundry room in your home, this guide will help you design a space that’s practical, efficient, and stylish. What is a Laundry Room? A laundry room is a dedicated space for washing and drying clothes. Typically equipped with a washer and dryer, it also includes additional features like a sink, storage cabinets, folding surfaces, and ironing stations. The purpose of this room is to streamline laundry tasks while keeping them separate from the main living areas. Essential Features of a Well-Designed Laundry Room Washing Machine with Dryer Option: Combo units save space and are ideal for compact homes. Ample Storage: Include cabinets, shelves, and hampers for organizing detergents, linens, and cleaning supplies. Counter Space: A flat surface for folding and sorting clothes keeps the area neat. Laundry Sink: Perfect for hand-washing delicates or treating stained garments. Drying Rack or Clothesline: Essential for air-drying items that can’t go in the dryer. Popular Laundry Room Layout Ideas 1. Under-Staircase Laundry Nook Turn unused space under the stairs into a compact laundry station. Add doors that blend with wall decor and use custom drawers or shelves for storage. 2. Balcony Laundry Setup Utilize balcony space efficiently with a washer, worktops, and overhead cupboards. Use weather-resistant materials and ensure proper drainage and electrical connections. 3. Mudroom with Laundry Combine your laundry area with a mudroom to keep outdoor items, shoes, and laundry essentials in one place. Open shelving and folding racks help keep the area tidy and multipurpose. 4. Bathroom-Laundry Combo Ideal for small homes, this layout requires thoughtful planning. Choose compact appliances and moisture-resistant materials. Install adequate ventilation and use smart storage to maximize space. 5. Attic Laundry Room Attic spaces require reinforced flooring and proper insulation. Opt for built-in shelves to fit under sloped ceilings and install ventilation to regulate temperature and airflow. Best Materials for Laundry Rooms in Indian Homes Flooring Choose slip-resistant and durable materials like vinyl, tiles, or concrete to withstand moisture, detergent spills, and appliance weight. Wall Finishes Use water-resistant paints (acrylic or epoxy) or ceramic tiles to combat humidity and allow for easy cleaning. Countertops Granite and quartz offer durability and style, while budget options like laminated surfaces provide reasonable moisture resistance. Cabinets Moisture-resistant plywood or PVC cabinets are ideal for humid environments. Choose finishes that are easy to clean and long-lasting. Modern Features to Upgrade Your Laundry Room Smart Appliances: Wi-Fi-enabled washers/dryers let you monitor laundry cycles remotely. Foldable Drying Racks: Save floor space with wall-mounted racks. Hidden Ironing Boards: Fold-away boards blend into cabinetry for a clean look. Automated Detergent Dispensers: Dispense the right amount every time to reduce waste. Energy-Efficient Lighting: Use LED and motion sensor lights for visibility and efficiency. Common Mistakes to Avoid in Laundry Room Design Poor Ventilation: Always include a window or exhaust fan to prevent moisture buildup. Insufficient Power/Water Points: Plan for all appliances and their placements in advance. Ignoring Ergonomics: Raise machines and storage to avoid bending or strain. Overcrowding: Avoid too many cabinets or baskets — focus on essential, accessible storage. Final Thoughts Designing a laundry room is not just about installing a washer and dryer — it’s about creating a well-organized and efficient space that supports your daily life. With the right planning, materials, and layout, you can transform even the smallest corners into a fully functional laundry zone that complements your home’s aesthetics.

Call Now Button